In this tutorial you will learn how to upload SVG files and other file formats into Cricut Design Space. If your new to the Cricut family “welcome” and let’s learn some new skills.
Cricut design space is really cool because it allows you to upload your own cut files so you can make anything you can dream up. This means you can create your own files in another design program like Inkscape and upload them for your Cricut to cut out. You can also find cut files to upload on etsy.
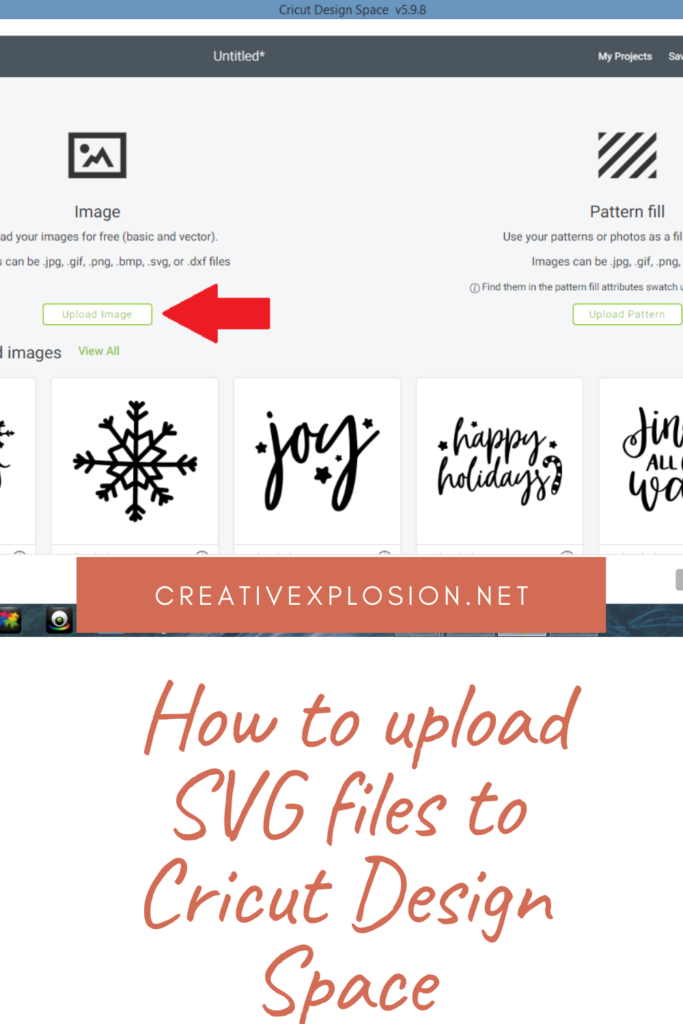
What types of files can you upload to design space?
Cricut allows you to upload most .jpg, .bmp, .png, .gif, .svg and .dxf files. Design space converts the image into cuttable pieces and it does this for free.
According to this Cricut guide I found online there are two different types of uploaded images: Basic and Vector.
- Basic images-These images upload as a single layer and Cricut allows you to edit the image before uploading. It allows you to pick which parts you want cut in the image and which parts you want to stay. These image file types include .jpg, .bmp, .png, and .gif.
- Vector Images-These files have already been designed in design software. They will upload in layers so you can adjust each part once it loads into design space. These file types include .svg and .dxf. You can not edit the image before it loads to design space it will load as is from the file.
How to upload SVG files to Cricut design space
This process applies to both .svg and .dxf files.
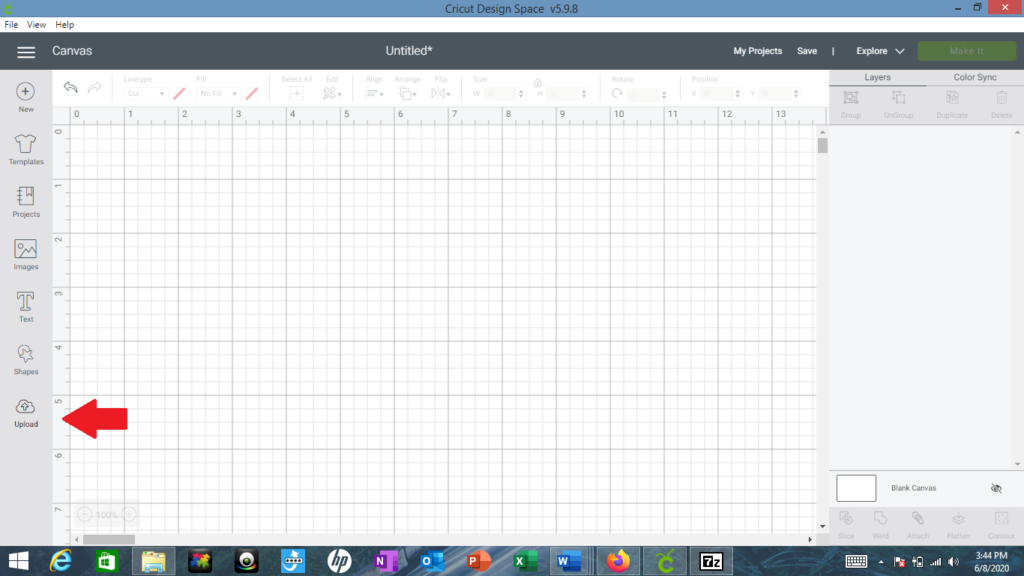
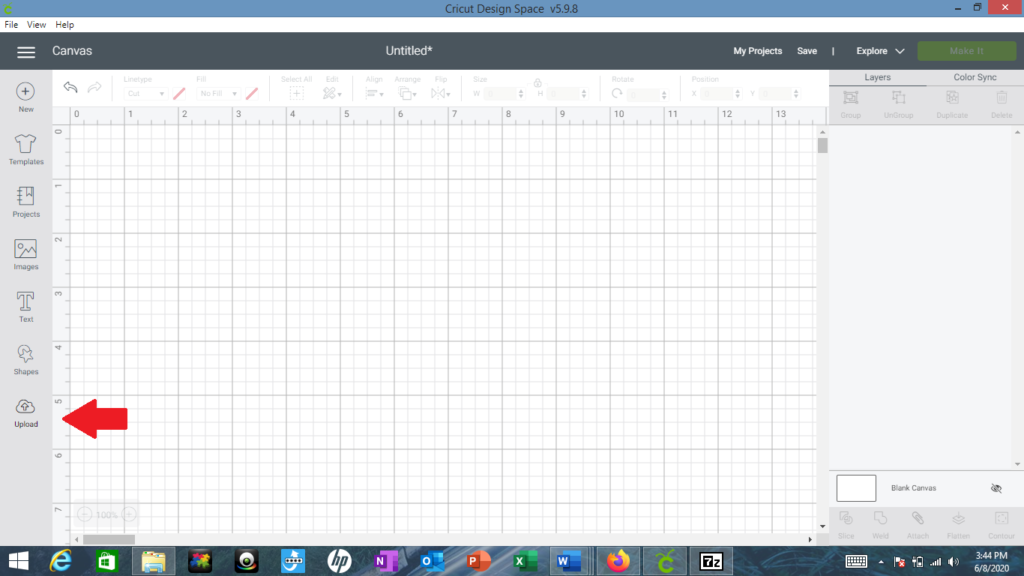
Step one: Press the upload button. The upload button is on the left menu bar and it is the very last option.
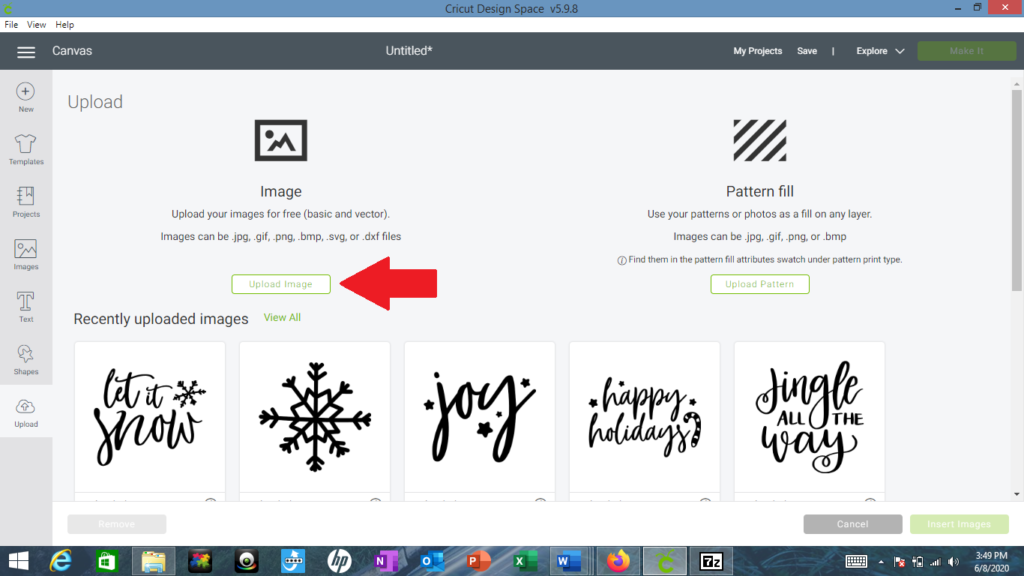
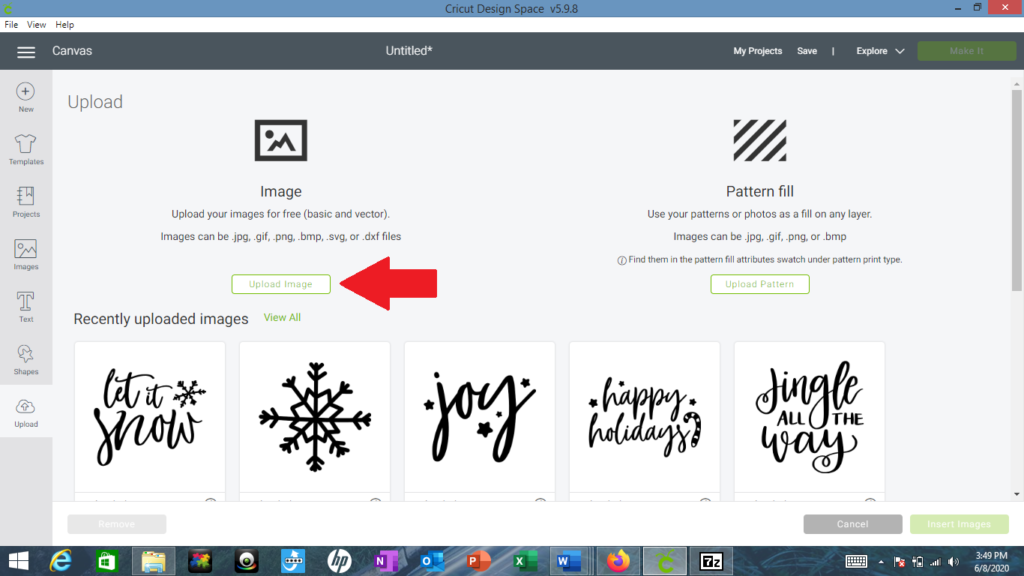
Step two: Pressing the upload button will bring you to a new screen. It has a place for image upload or pattern upload. It also has your recently uploaded images.
You want to click the button that says “upload image” and it will be on the left.
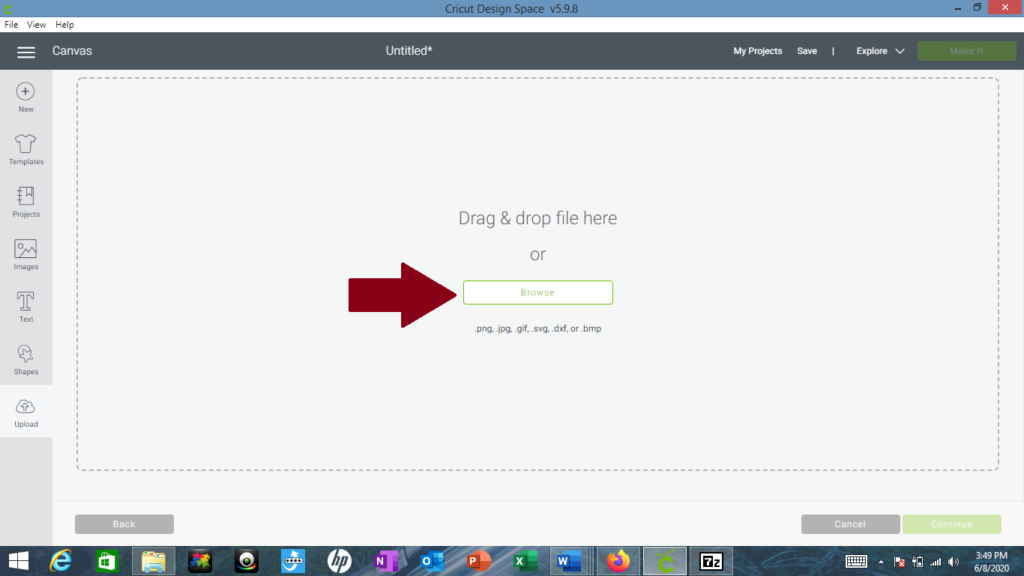
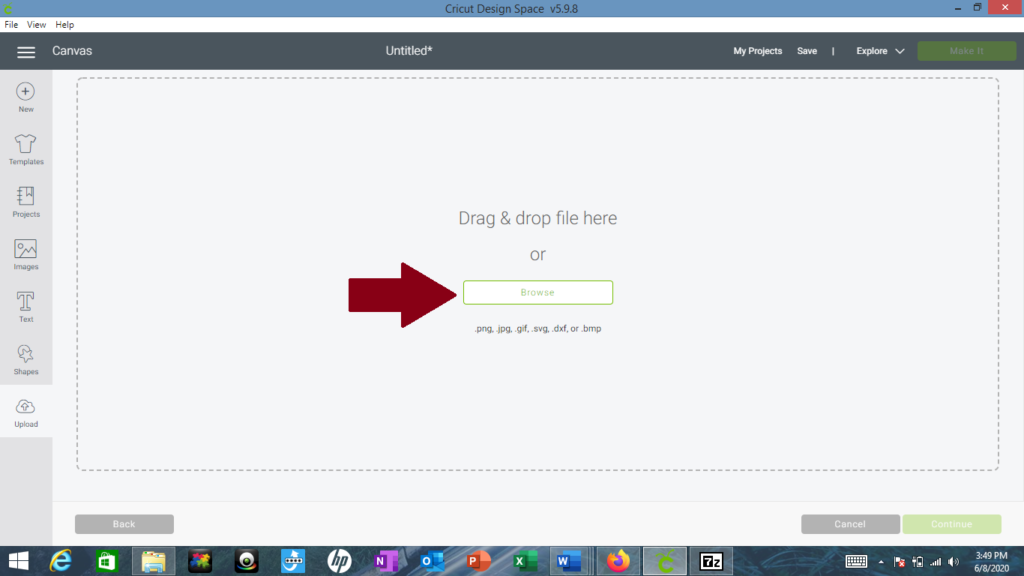
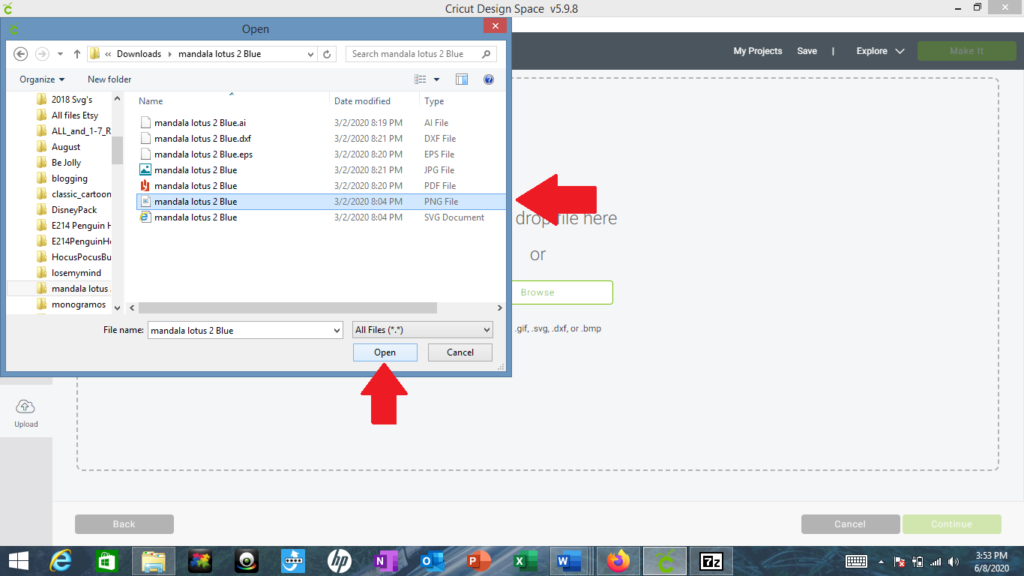
Step three: This will bring you to a page that has a browse button. You can click the browse button and it will take you to your files and you can upload from there. Just click on your file and then click open or you can just drag and drop the file inside the box where it says drag and drop file here.
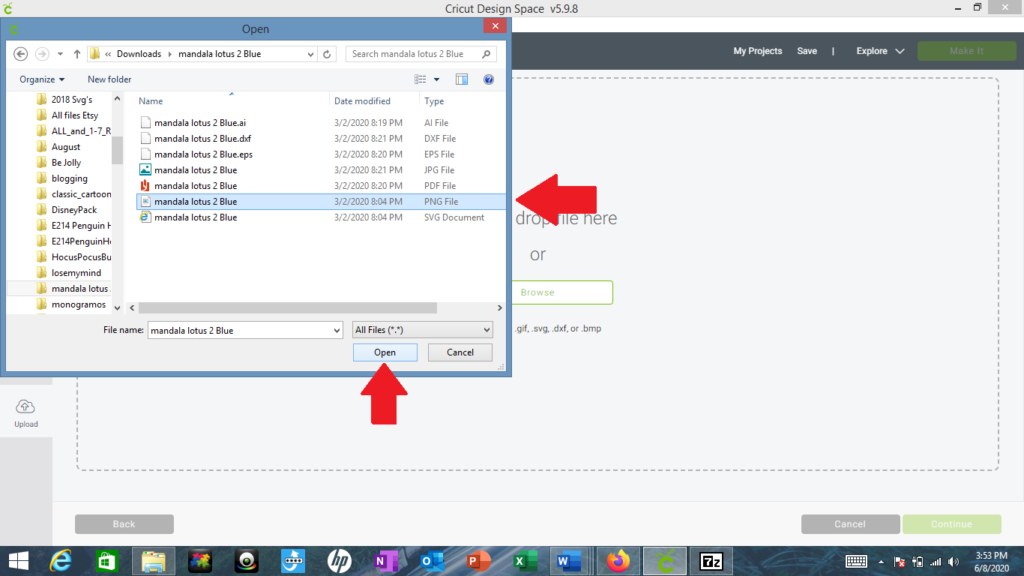
Step four: This will then bring you to a screen where you can name and tag the svg file. This will allow you to find it later on when you are looking for it. Tags are recommended but not required. For example, I might tag this svg with the word mandala.
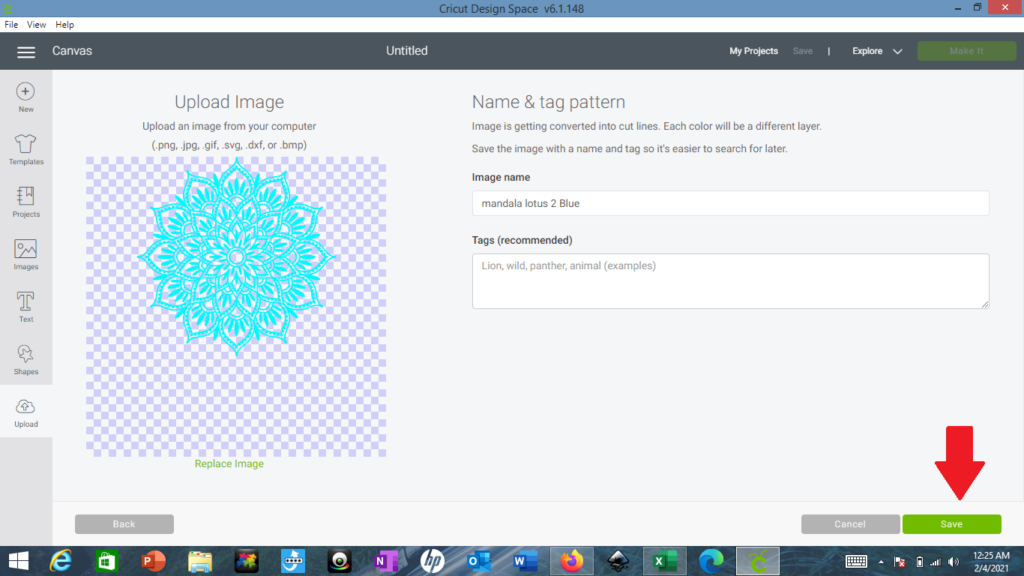
Step five: Click save to finish uploading your file. Save is a green button on the bottom right corner. Your file will then appear in the recently uploaded images.
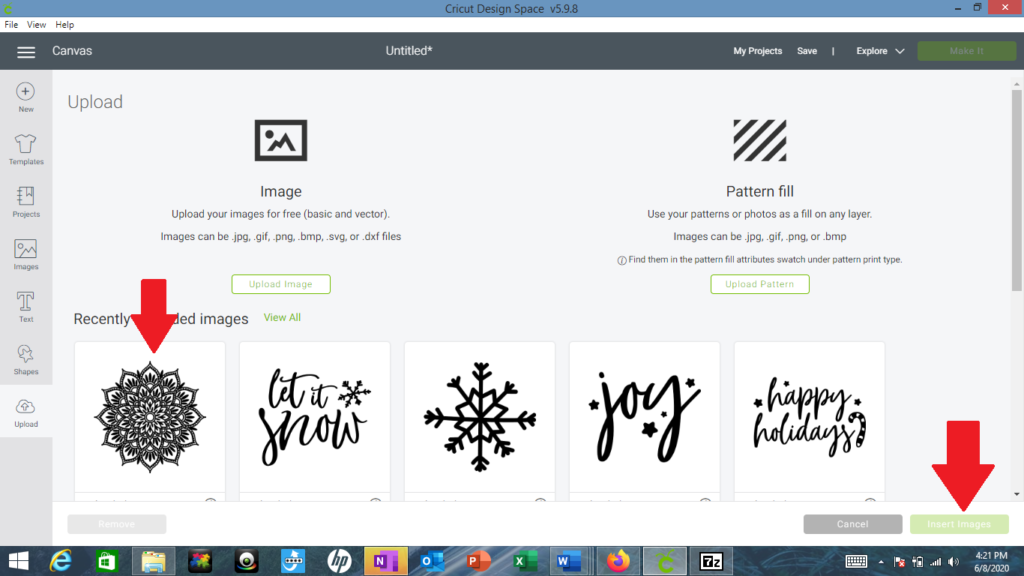
Step six: Click on your image to highlight a green box around it. Then click the green “insert images” button on the bottom right hand corner
This will add your image to your canvas to begin working with.
How to upload basic files such as .png files.
This process applies to all the basic images such as .jpg, .bmp, .png, and .gif.
The process starts out the same as for the SVG file.
Step one: Press the upload button on the left menu at the bottom.
Step two: Click “upload image.”
Step 3: Click the browse button then click on your file and click open.
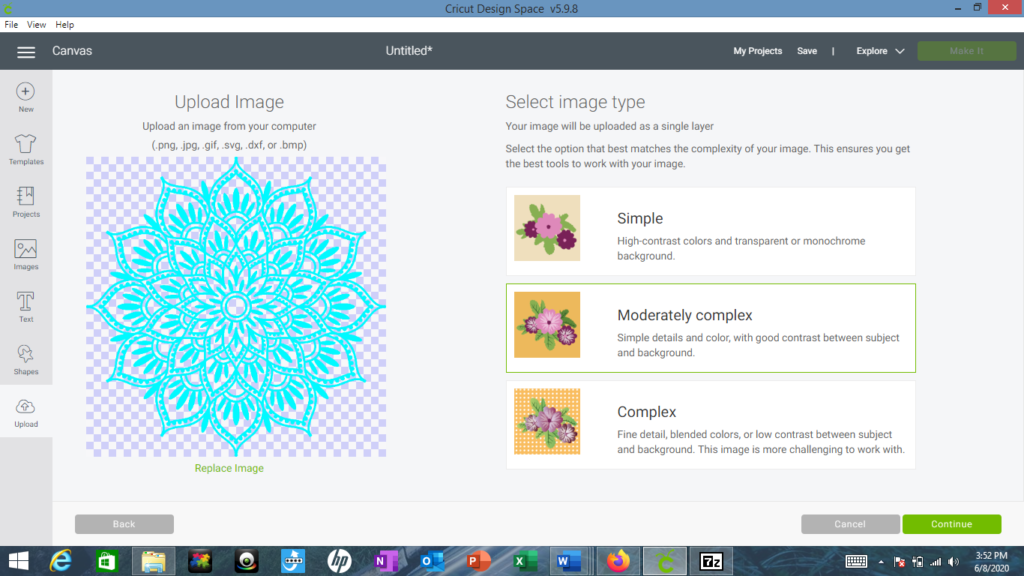
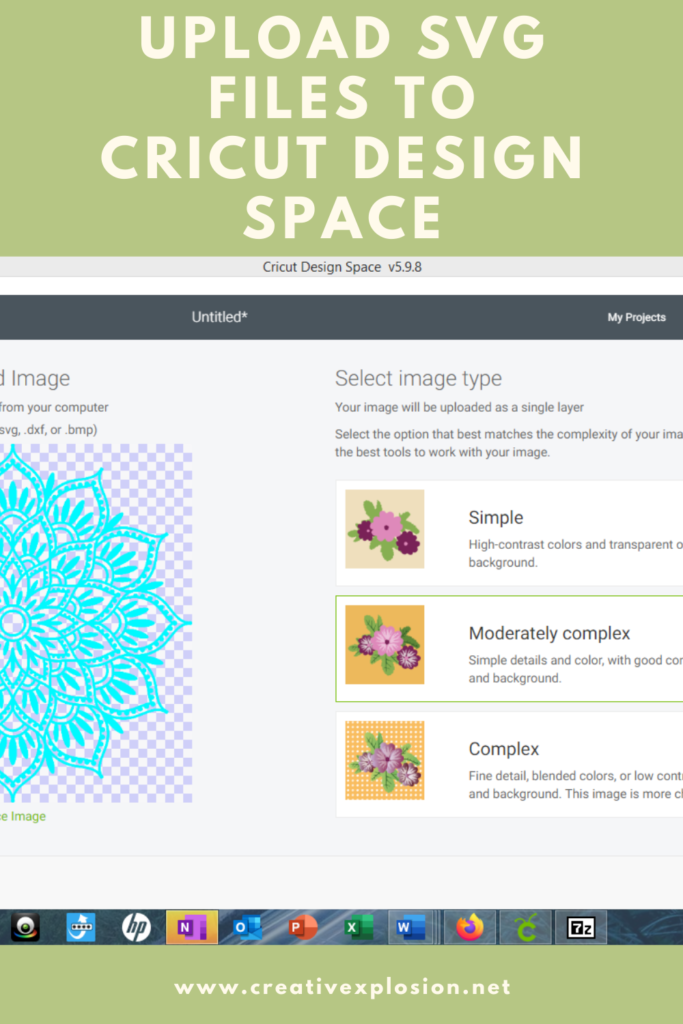
Step four: This will bring you to a screen with your image on the left and 3 image types on the right…
- Simple-this means the image has high-contrast colors and transparent or monochrome background.
- Moderately complex-this means the image has simple details and color, with good contrast between subject and background.
- Complex-fine detail, blended colors, or low contrast between subject and background. Cricut says this image is more difficult to work with.
I usually click moderately complex on all my files I upload.
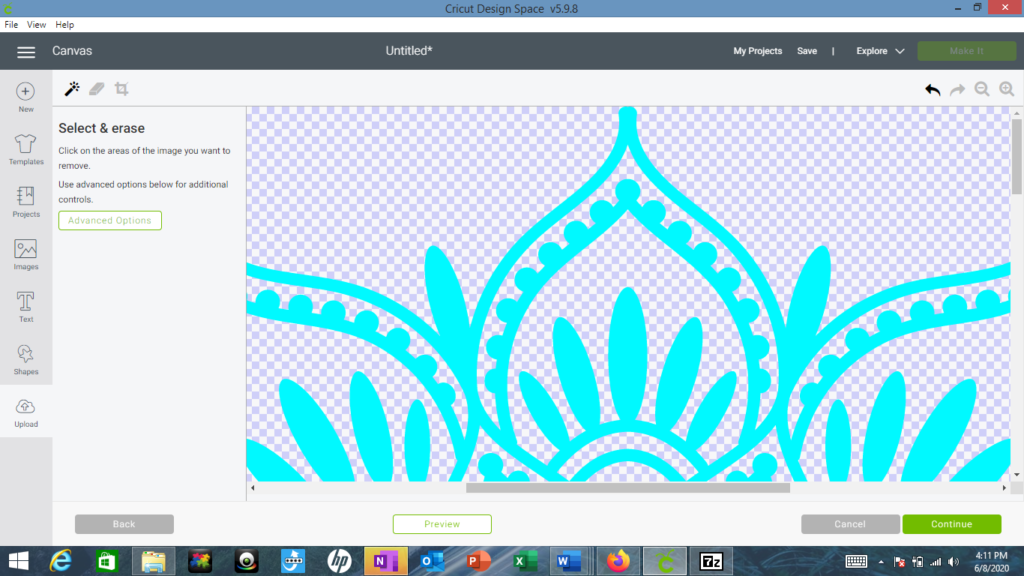
Step five: Now you have the option of erasing parts you don’t want. Your mouse will turn into a plus sign. Anywhere you click that part of the image will turn into a grey and white checkered background. The grey and white checks tell you what you have erased and what space you want it to cut.
If you accidentally erase a part you really need you can undo it by clicking that part again.
Step six: You will then be taken to a screen that gives you the option to save as a print and cut image or just a cut image.
A print then cut image would be like an image that has multiple colors you want to be able to see on the finished project. It does not upload these files into layers to separate colors. A cut file will just cut the outline of whatever color you put on your mat.0
Step seven: This will bring you back to the image upload screen with your recently uploaded images at the bottom. Your new image should be the first one in the row. Click on it to highlight and then click the green “inset images” button on the bottom right corner.
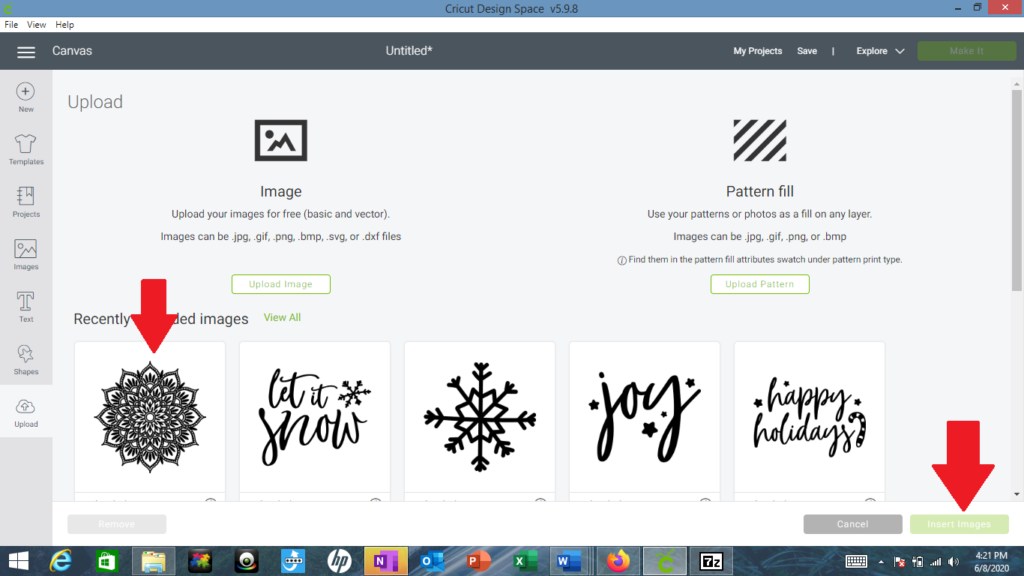
Step 10: To insert your image just click on your image and then press the green insert image button on the bottom right corner.
That’s it, now you have successfully uploaded your picture to Cricut Design space.
If your new to Cricut and still learning you may like to look at my other tutorial on attaching in Cricut design space.
Make sure to sign up for my freebie 12 Cricut tips for beginners. It will give you some helpful tips to be more successful with your Cricut.
